Sunday, March 25, 2012

Easy as Pie - Chicken that is...

Today's meal is brought to you by a suggestion from the husband. I didn't have anything planned and I asked him for a request. So he threw out Chicken Pot Pie. Uh, okay. A quick search on foodnetwork.com brought up a lot of recipes, all which appeared very difficult and required individual bowls for your pot pies (which I do not own). I finally found an easy chicken pot pie recipe (yes, easy was in the title - lucky me). The husband was not at all pleased that this recipe was all in one skillet, but hey I'm the cook so I can do what I want (insert picture of me sticking my tongue out). I did grant him one request. The recipe does not call for potatoes, but I added them because he loves them. I also didn't add any onions.

Since I'm the master chef that I am, I didn't follow the instructions to a tee. I chopped up my chicken first and then cooked it. I figured it would cook faster that way. I couldn't find Sweet Paprika, there was regular and smoked, but no sweet. So, I seasoned my chicken with poultry seasoning, pepper, and my go to seasoning Slap-Yo-Mama. I fried it up and put it to the side. I cubed one potato and boiled it for about 15 minutes and drained them. I decided I would add the potatoes at the same time I added the chicken to the recipe.

Chicken

Potatoes

Then it was time to cook up the frozen peas and carrots. I cooked those up and added the garlic (Tip: if you ever want to just make it smell like you're cooking up something good, fry up some garlic it made my kitchen smell yummy). I was supposed to sprinkle in the flour and let it dissolve in the "juices", but I didn't have any juices, so I added some water.
Peas, carrots, and flour
I added my chicken stock per the instructions and waited for it to thicken before I added the heavy cream. Does this look like it's thickening?
Chicken Stock added

I waited a while and still no thickness. In a panic, I added some more flour. I failed to sprinkle it in, so I ended up with some nice little flour balls in the mixture. Let's hope those cook out. I went ahead and added the heavy cream hoping that would thicken it, but no such luck. Ah well, on to my crust. I pulled out my store bought crust and then quickly realized that it was going to be a little tough getting it out of the foil pan it comes in. As I pulled it out, it begin to tear and it didn't seem like it was going to cover my entire pan. Uh, what now? Master Chef to the rescue! I balled two crusts together and made them into one. Ahh, perfection... not quite, but this should do.
Crust out of the pan
Ball of Dough!

I'm the next Betty Crocker!


I added my chicken and potatoes to my creamy, but not thick mixture. Now my instructions said I could tuck my excess edges inside the pan. That wasn't happening for me, so extra crust was folded over.

Chicken and potatoes added

Martha Stewart eat your heart out!

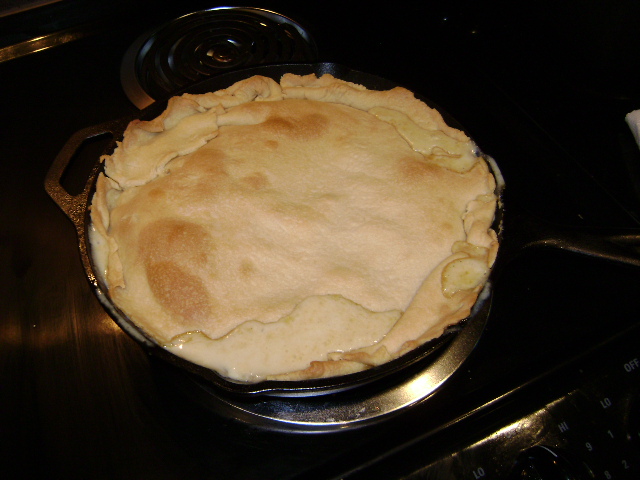
Into the oven it went. As I watched it bake, I noticed that some of the filling was spilling out (now I have to clean the oven). I also realized that I left out the last two steps. I didn't cut slits in the crust and I didn't brush the crust with egg wash. My bad. Fifteen minutes later (the recipe says 20, but it looked done to me), we have a Chicken Pot Pie...

Can you see the filling that oozed out?


It's not the prettiest and I have to admit it was a little bland. Apparently, my Slap-Yo-Mama is not as salty as I thought because the pie needed salt. Maybe I shouldn't have used the unsalted chicken stock, but I thought it would be healthy. Next time, I'll have to figure out how to get the filling thicker because it was a little soupy. 

My plating skills need work.

A couple of shakes of salt and everything was all better. So, Chicken Pot Pie + Salt = Success. 


Sunday, March 18, 2012

Chicken Empanadas

I know it's been a long time, but it's tough for a lazy bum like myself to keep up with anything. I caught the productivity bug this weekend, got a little writing done and got back to this blog. I found a recipe for Chicken Empanadas when I was cleaning out my junk drawer. I didn't use pie crust, I used these Goya Discos I found at the store. For my chicken, I cut up some chicken tenderloins, seasoned it with some Slap-Yo-Mama, and fried it up. Since the recipe said the chicken should be chopped, I used my little food processor to chop it up.


I mixed up all my ingredients, but had a little trouble with my cream cheese. I didn't let it soften, so the mixture just had these big chunks of cream cheese in it.


It was all easier than I thought. When I filled my discs, I tried to smooth out some of the cream cheese chunks (I didn't want them to be cream cheese empanadas). I think I did a good job of folding up my empanadas.


I was a little worried about baking them because the Goya instructions said to fry them. I watched them as they baked and was a little worried because I could see some of them coming apart. They came out okay, but as my husband kindly pointed out they looked like they had the mumps.


I paired it with black beans and Goya Mexican Rice.


Even though they looked a little scary, everything was yummy. My husband had seconds and so did I. Please excuse the paper plate and plastic fork, but I do hate cleaning dishes and this makes for an easy, breezy clean up. Chicken Empanadas = Success!

Sunday, January 8, 2012

Fried Lasagna Bites

Trying to figure out what to try next was really tough.  There are so many recipes out there. I decided to look for a recipe from my boy, Aaron McCargo, Jr. I rooted for him on the Next Food Network Star competition.  I hardly ever get to watch his show, Big Daddy’s House, but knew he would have some pretty tasty stuff to cook.  I landed on Fried Lasagna Bites. They looked easy enough, except I hate frying food. I always manage to get hot grease everywhere.  I made a grocery list and headed to the store.  Then I hit road block #1. There was no Sweet Italian Sausage. They had mild and hot, but no sweet.  Time to improvise!  I found some Sweet Italian Turkey Sausage. It should work, right? So I get home and get all my ingredients lined up.
The recipe calls for chopped basil leaves and Italian seasoning.  I must say that these spices look exactly the same and had me a little worried.  When I added them to my meat mixture, I held back on the basil because it just looked like too much.  Let's see if I'll regret this later. I have everything cooling down and it's time to get the cottage cheese and mozzarella prepared.  Road block #2 - it says to strain the cottage cheese.  I've never cooked anything with cottage cheese and now I'm a little scared that it has to be strained.  To top it off, the only thing I have to strain things is my colander.  I'm not sure if it will work, but it's all I have.  Does this looked strained?
I mix the cottage cheese and mozzarella together and I get a little worried again.  This looks like an awful lot of cheese compared to my meat mixture.


It all looks okay when I mix it together.


Now it's time to stuff the manicotti.  Which proves to be a little tough for me. Either it falls out the other end or I split the shell.  I quickly googled a video of how to do it and things begin to go more smoothly.  However, it takes forever to do it.  My feet hurt and I want this to be over with.  I finally get it done. Aren't they pretty?

I'm not done yet.  I get these bad boys firmed up and cut them in thirds per my instructions.  Then I have to dip them in flour, egg, and bread crumbs.  Every two pieces, I have to rinse my fingers because the bread crumbs are sticking to them more than the pieces.  This is taking way too long and I get a few pieces done.
I give up on breading them.  I think I have enough breaded to complete the experiment and the rest are going to go into the oven.  I decide to use my deep fryer  (that I've used once in 3 years) to save myself from any grease burns.  Tada! My fried lasagna bites are born.

I won't lie and say they were the best ever, but they were pretty tasty.  The hubby ate them and the only problem was that I think I cooked the pasta too long and it was a little chewy.  I also have to say that I don't know where they got the prep time for this recipe from.  It says 35 minutes, but I think I took an hour.  I don't know how people cook anything that's not straight of a box.  My feet hurt and I have all of these dirty dishes.

 Fried Lasagna Bites=Success!

Monday, January 2, 2012

Cinnamon Biscuits

My husband has been franticly looking for cinnamon biscuits that he used to eat and we can never find them.  Being the awesome wife that I am, I decide that I can make some.  How hard could it be to make a cinnamon biscuit?  I went to the internet to find a recipe and most of them required baking canned biscuits and dipping them in cinnamon. In my mind that’s not a cinnamon biscuit.  It should have cinnamon inside. Right? So, being the genius that I am, I come up with the perfect plan. I’ll buy some biscuit mix and just add cinnamon.  Yummy!?

I buy a mix that only requires water to be added.  I pour in cinnamon (no measurements, I got this), sugar, and a cap full of vanilla extract. 

As you can see, I may have went a little overboard on the cinnamon.  But hey, this could be good.  I add ½ cup of water and the mix is still a little dry, so I add a little more.  As my confidence is slowly fading I drop the mix onto the cookie sheet. 

Into the oven they go and I’m wondering what else I have in the kitchen that I can eat for breakfast.  Ten minutes later, I remove them from the oven. 

They look like big piles of dung, but I take a bite and… GROSS!  When my husband tried them, he said they weren’t too bad, just a little dry.  Back to the drawing board.  Cinnamon Biscuit = FAIL.